- Model or Input validation in ASP.Net Core
- Basics of ASP.Net Core
- Caching in ASP.Net Core
- Rate Limiting in API
- Nunit Test for Model Validation
- Serilog in Web API to Store Logs
- Web API Crud using Stored Procedures
- Auto Mapper in ASP.Net Core
- Crud on Bulk Data
- Import Data Excel to DB
- Export Data in Excel
- ViewBag in MVC Core
- ViewData in MVC Core
- Service Lifetime in MVC Core
- LINQ Queries
- JWT Token in ASP Core
- ViewModel in MVC
- Custom MiddileWare
- Global Exception Handling using Custom Middileware
- Exception Filter
- Dropdownlist in ASP Core
- Authentication in MVC
- MVC Crud with ADO
- Paging in MVC
- Casecading Dropdown
- First React Project
- Hooks in React
- React Crud with API Core
- Save Image in DB
- MVC Core Charts
- State Management
- Session in ASP Core
- Design Patterns
- Singleton Pattern
- Dependency Injection
- Keyed Services Dependency Injection
- Repository Pattern
- Factory Pattern
How to Import Data From Excel to Database in ASP.NET Core
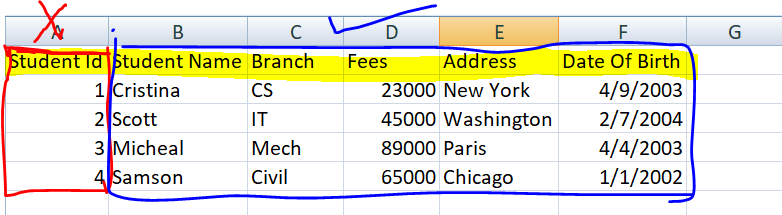
Problem Defination :- We have a requirement in which we need to import excel data into the SQL server database as it is in ASP .Net Core application. For example we have Excel sheet in which hundreads of data rows with few columns that we need to import or save into a table in database like tblStudents table and we need to import that sheet on uploading it from GUI using a upload button.
Below is the step by step process explain in details so that you can follow it and import the data into database from excel sheet in your application.
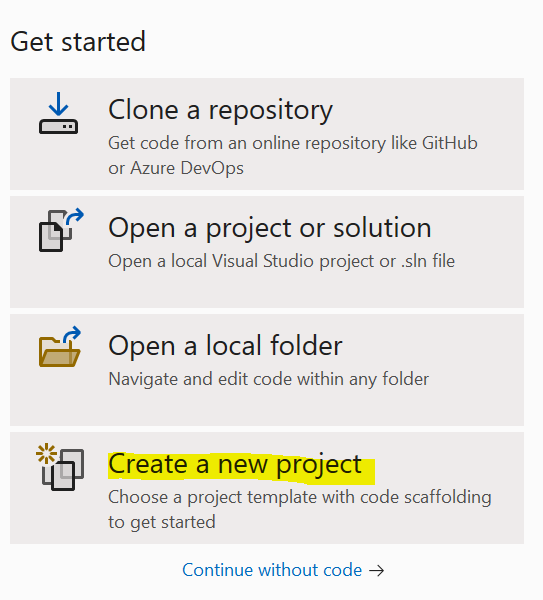
Step 1 :- Create Project using Microsoft Visual Studio
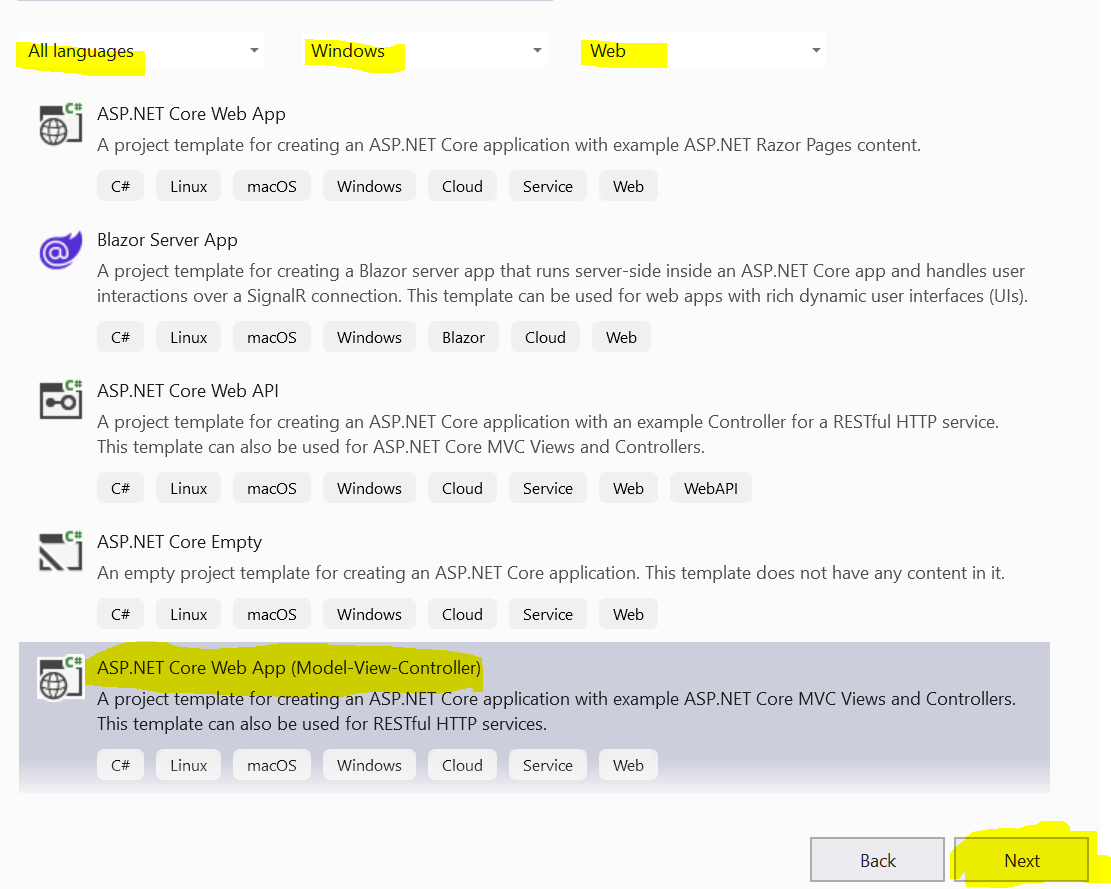
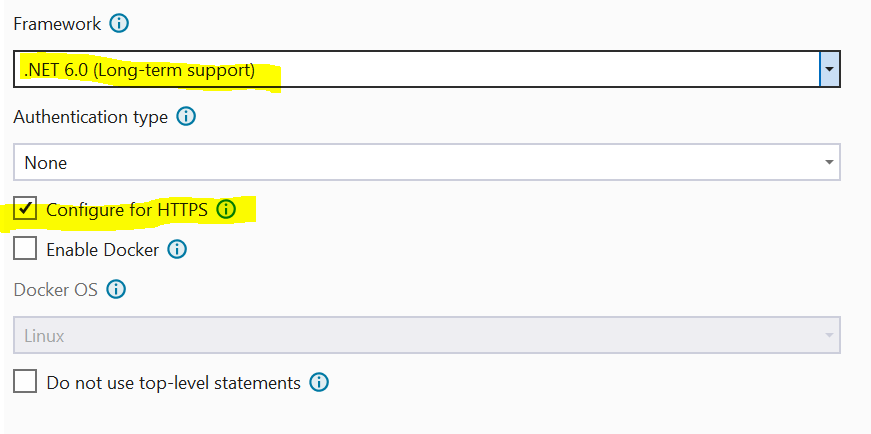
Select Project Type ASP.Net Core Web App(Model-View-Controller)
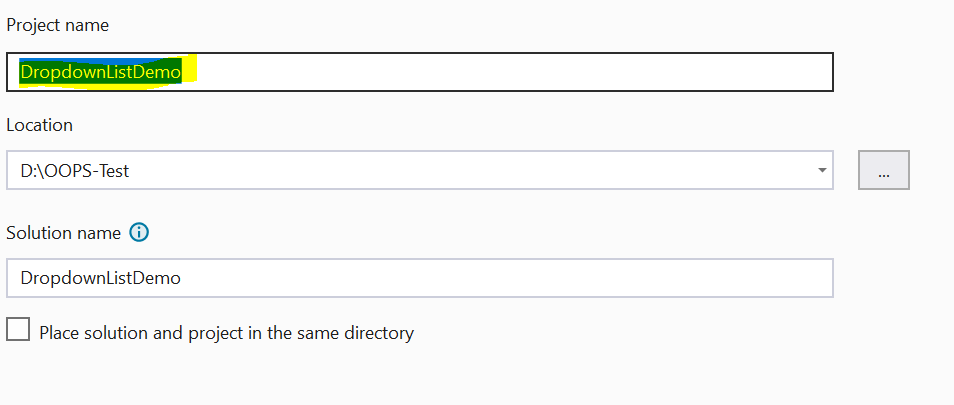
Write Name of Your Application Project
Choose Suitable framework version and Check the checkbox for Configure Https
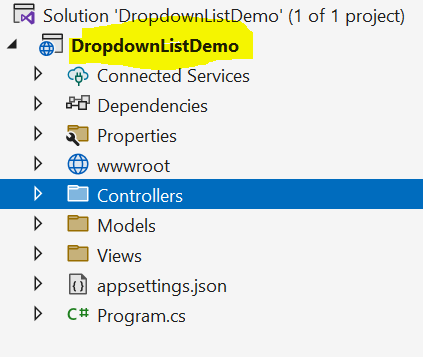
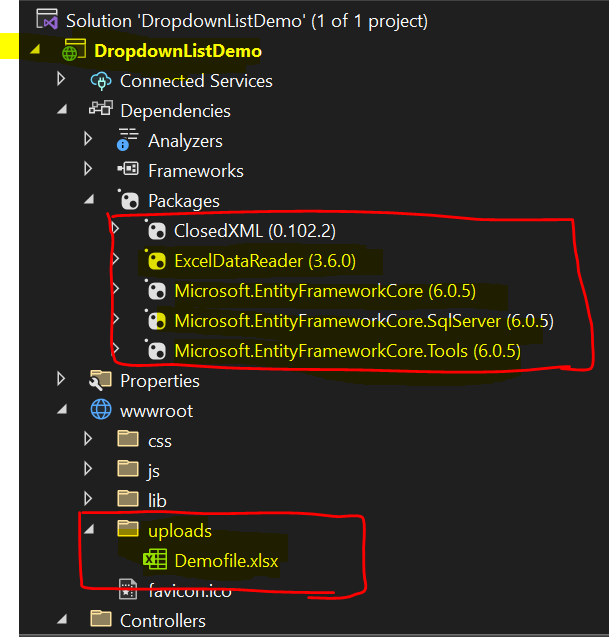
Your Solution explorer looks like as in image
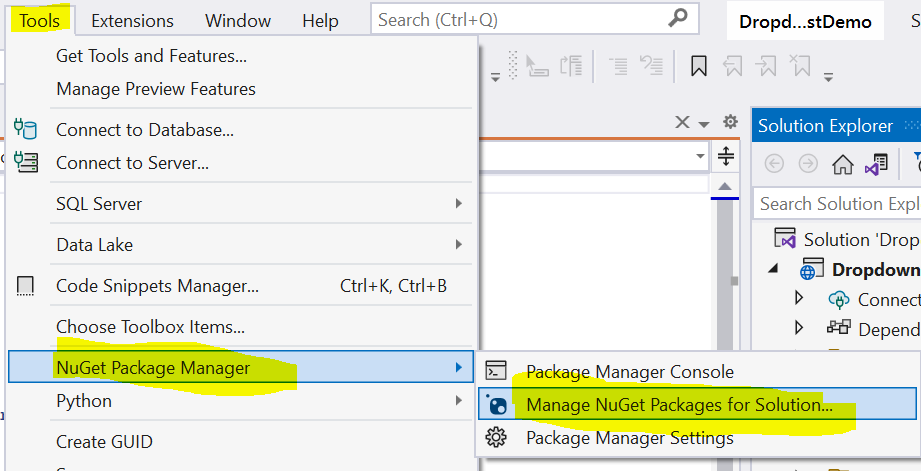
Step 2 :- Install the required packages from nuget package manager
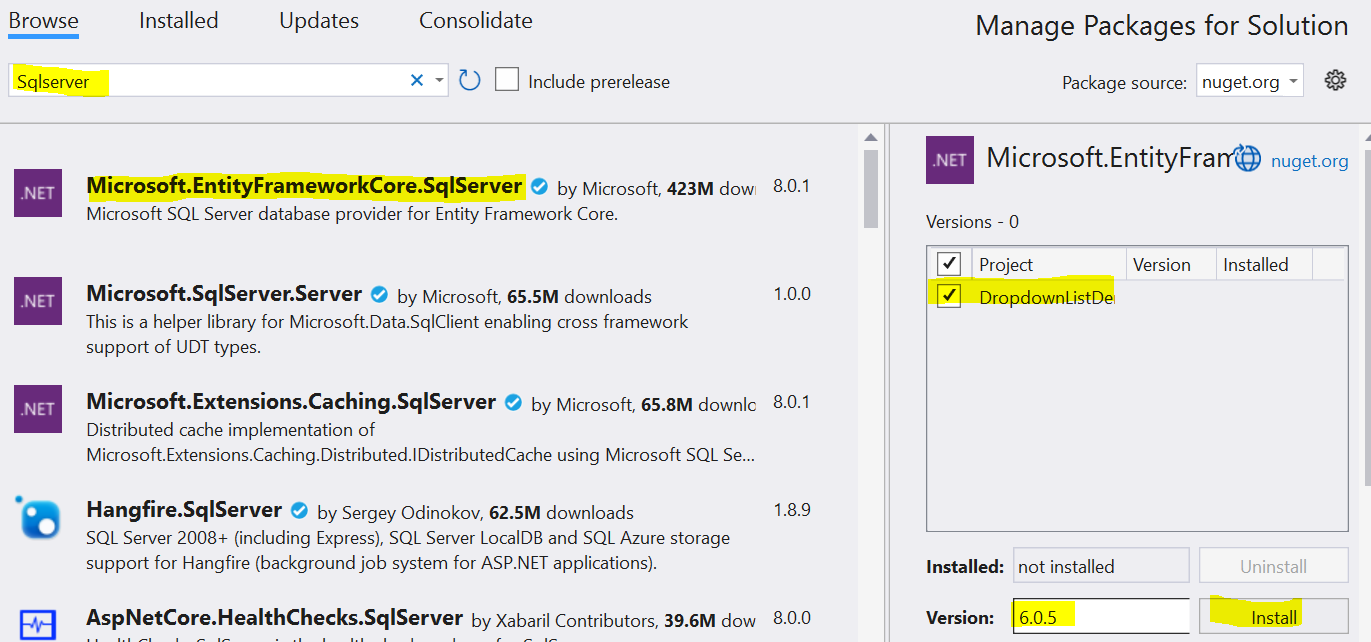
Select Microsoft.EntityFrameworkCore.SqlServer with compatible version and install it.
Select Microsoft.EntityFrameworkCore.Tools with compatible version and install it.
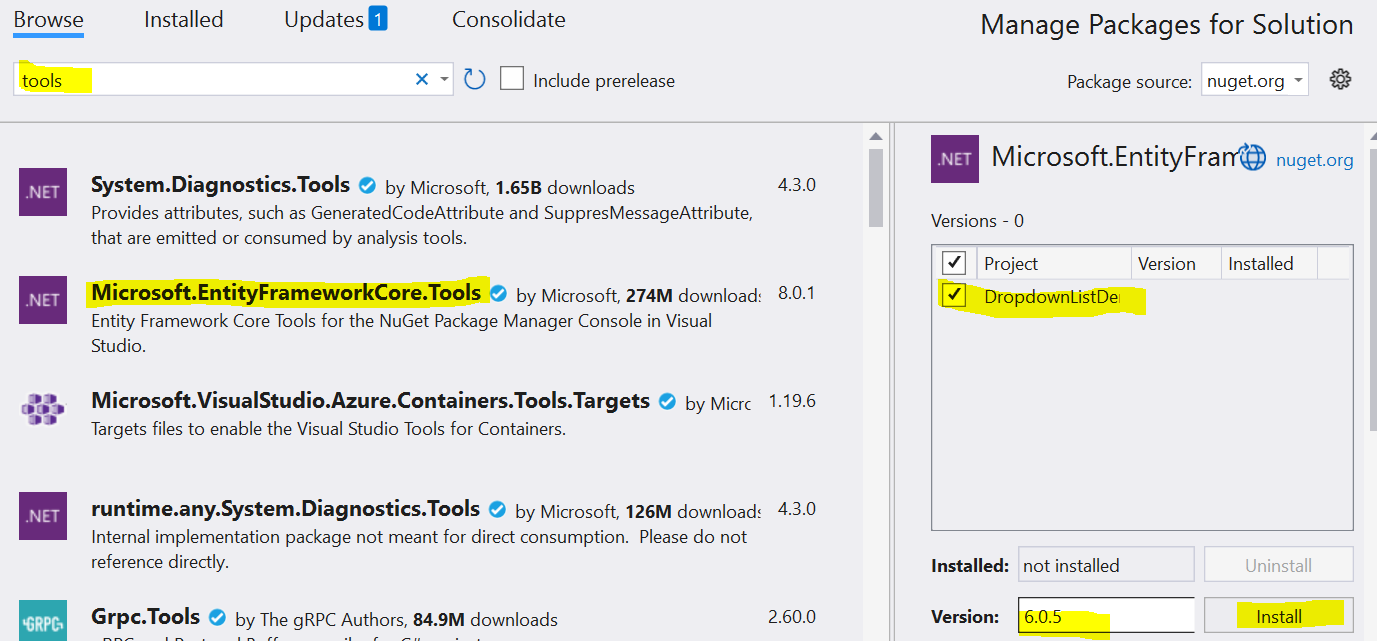
Select Microsoft.EntityFrameworkCore with compatible version and install it.

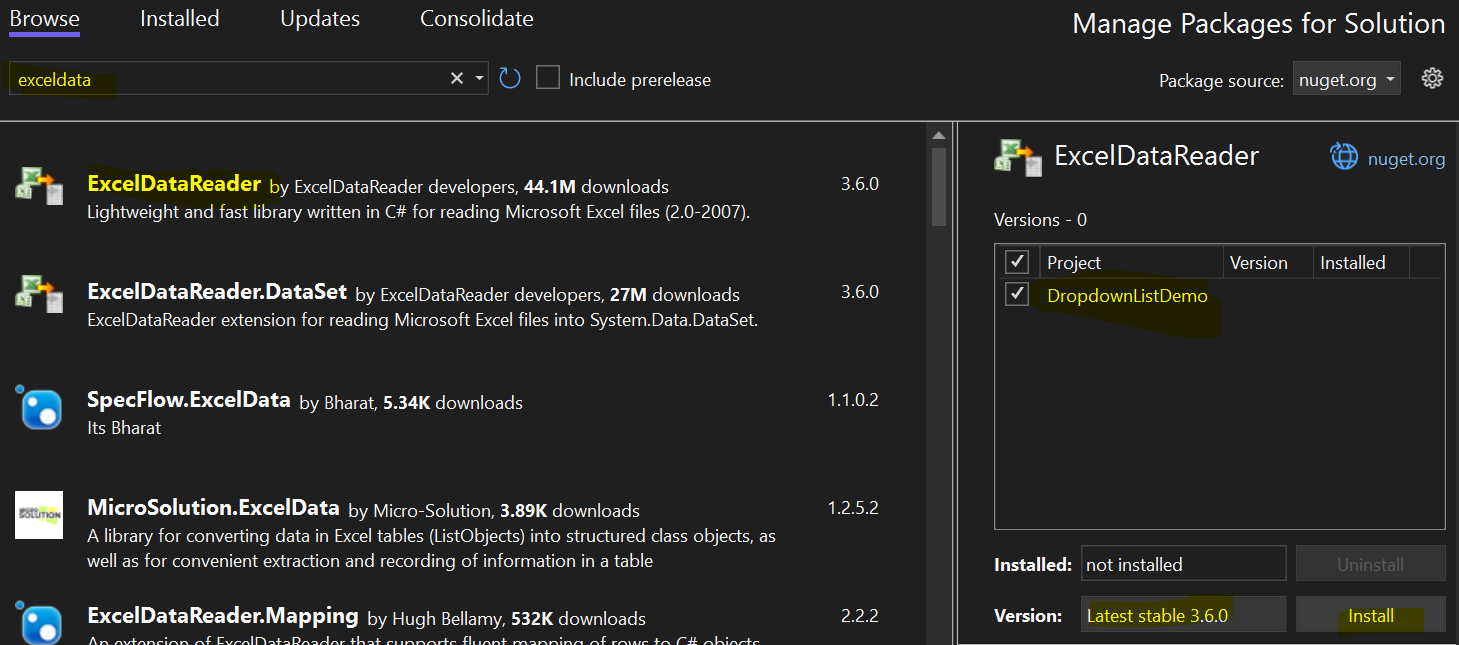
Select ExceldataReader with compatible version and install it.
You can check installed packages as shown in below image
Step 3 :- Create a Model Class Student for importing data from excel to database.
 public class Student
    {
        [Key]
        public int StudentId { get; set; }
        public string StudentName { get; set; }
        public string Branch { get; set; }
        public int Fees { get; set; }
        public string Address { get; set; }
        public DateTime DateOfBirth { get; set; }
    }
Step 4 :- Create a AppDbContext class for Dbcontext and use Student model class as a DBSet as shown in below image and code.
 public class AppDbContext : DbContext
    {
        public AppDbContext(DbContextOptions options)
        : base(options)
        {

        }
        public DbSet tblStudents { get; set; }
    }
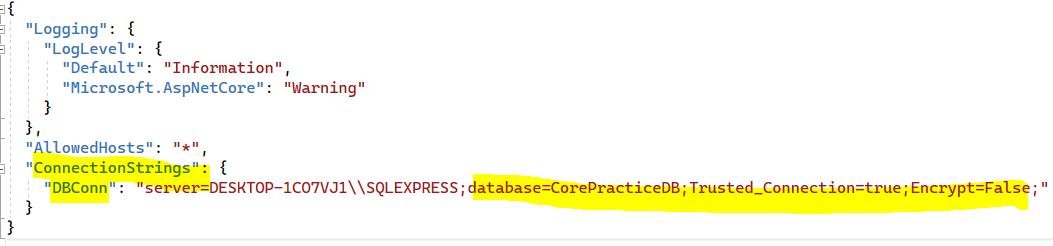
Step 5 :- Define a Connection string into Appsettings.Json file as shown in below image.
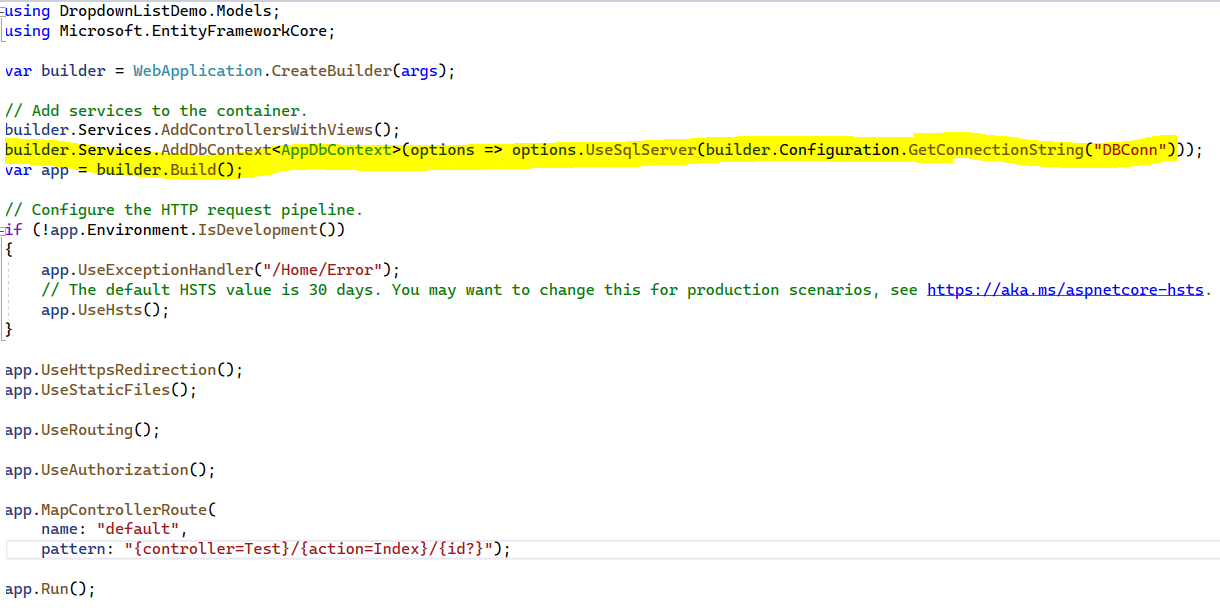
Step 6 :- Add a Middileware for DBContext in Program.cs file as shown in below image.
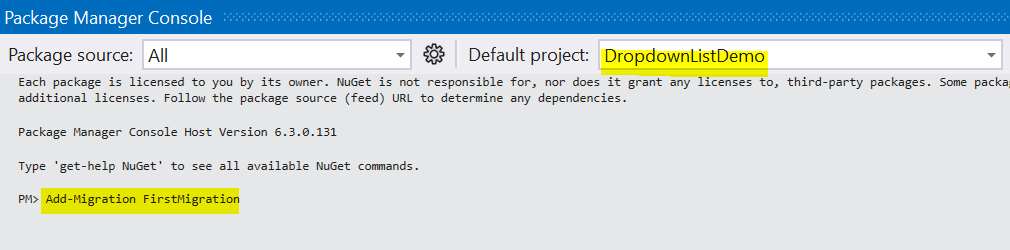
Step 7 :- Trigger the Add-Migration "FirstMigration" Command as shown in below image.
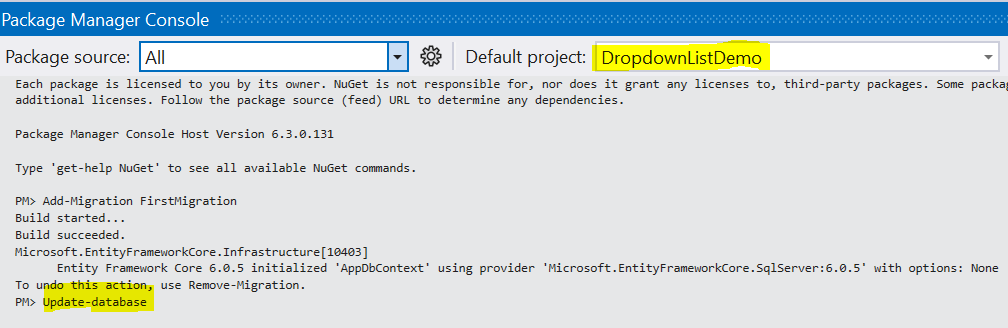
Step 8 :- Trigger the Update-Database Command as shown in below image.
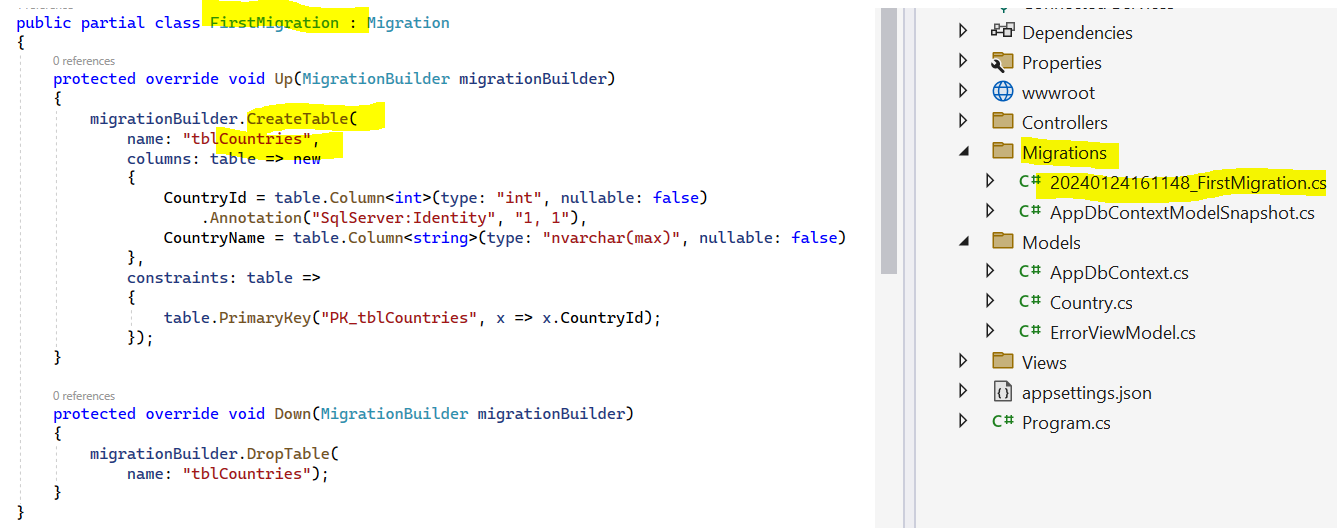
After triggering above migration commands you can see a newly generated migration folder in solution and there is a FirstMigration Class is autogenerated from migration as shown in below image.
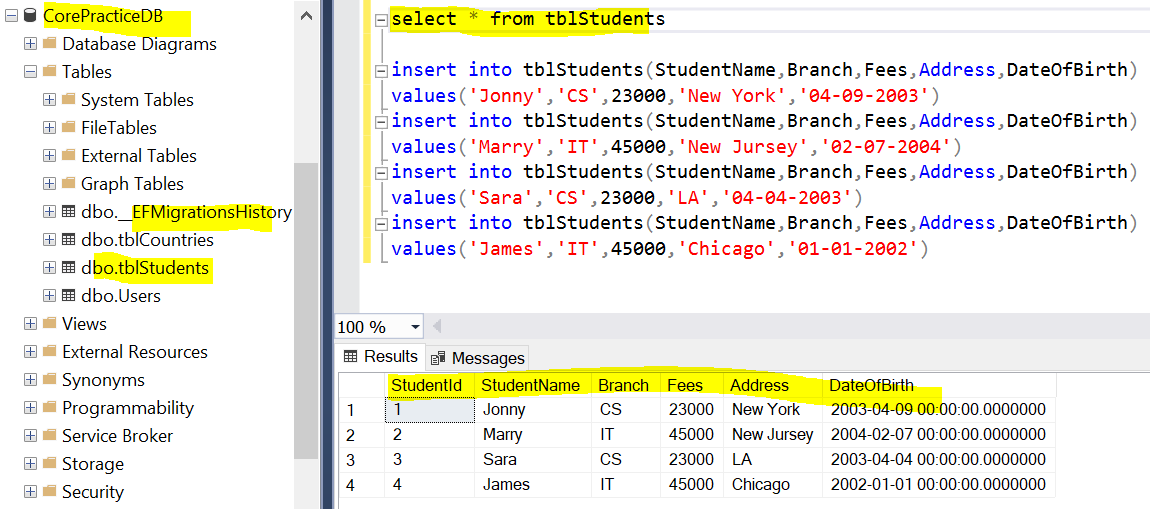
After triggering above migration commands you can see a newly generated migration tables in databse and there are some other migration history tables are also autogenerated from migration and insert the data into tblStudents as shown in below image
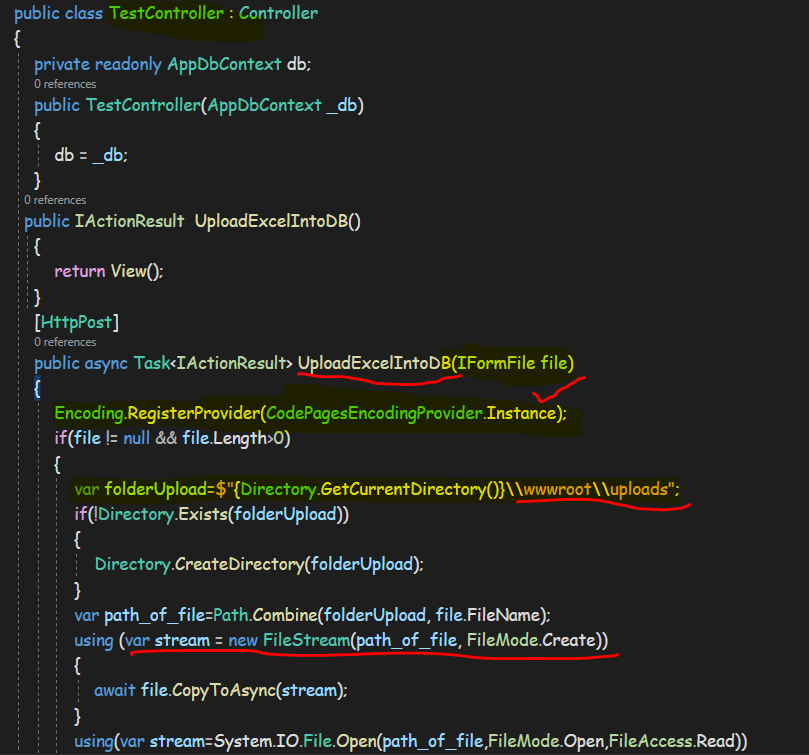
Step 9 :- Create a Controller and Named it TestController and inside controller create one action Method named it UploadExcelIntoDB and write the code in the action method as shown in below image and code example.
public class TestController : Controller
{
private readonly AppDbContext db;
public TestController(AppDbContext _db)
{
db = _db;
}
public IActionResult UploadExcelIntoDB()
{
return View();
}
[HttpPost]
public async Task UploadExcelIntoDB(IFormFile file)
{
Encoding.RegisterProvider(CodePagesEncodingProvider.Instance);
if(file != null && file.Length>0)
{
var folderUpload=$"{Directory.GetCurrentDirectory()}\\wwwroot\\uploads";
if(!Directory.Exists(folderUpload))
{
Directory.CreateDirectory(folderUpload);
}
var path_of_file=Path.Combine(folderUpload, file.FileName);
using (var stream = new FileStream(path_of_file, FileMode.Create))
{
await file.CopyToAsync(stream);
}
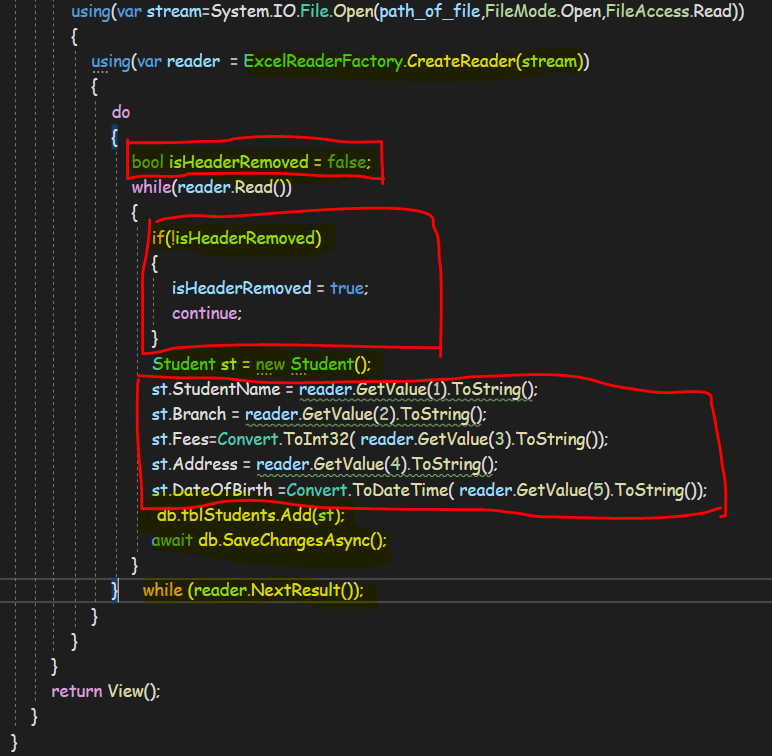
using(var stream=System.IO.File.Open(path_of_file,FileMode.Open,FileAccess.Read))
{
using(var reader = ExcelReaderFactory.CreateReader(stream))
{
do
{
bool isHeaderRemoved = false;
while(reader.Read())
{
if(!isHeaderRemoved)
{
isHeaderRemoved = true;
continue;
}
Student st = new Student();
st.StudentName = reader.GetValue(1).ToString();
st.Branch = reader.GetValue(2).ToString();
st.Fees=Convert.ToInt32( reader.GetValue(3).ToString());
st.Address = reader.GetValue(4).ToString();
st.DateOfBirth =Convert.ToDateTime( reader.GetValue(5).ToString());
db.tblStudents.Add(st);
await db.SaveChangesAsync();
}
} while (reader.NextResult());
}
}
}
return View();
}
}
Step 10 :- Create a View and write the below Html code into it as shown in image.
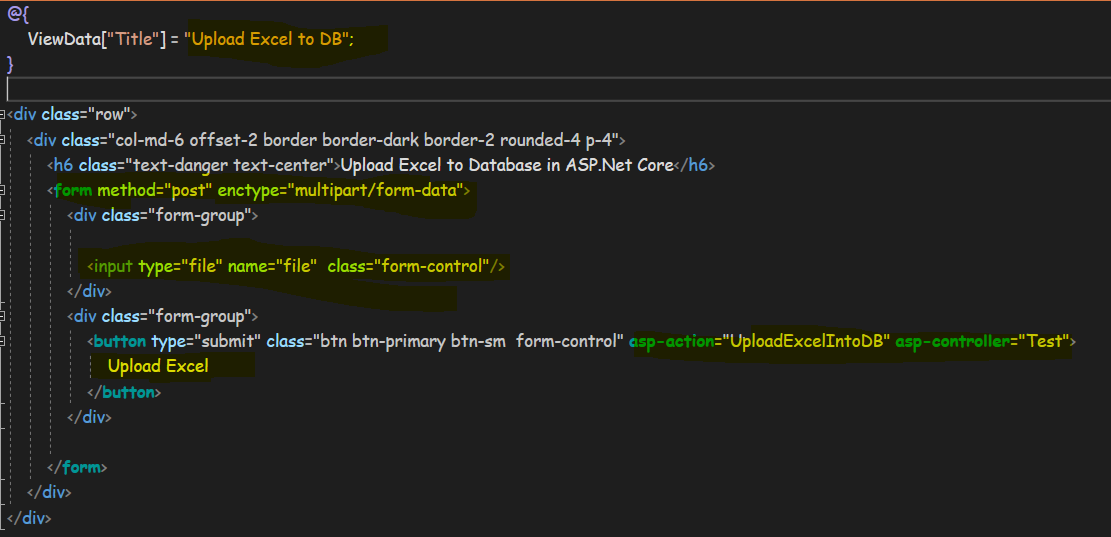
Now run the application you will get the Upload Excel button on GUI as output that is shown in below image.
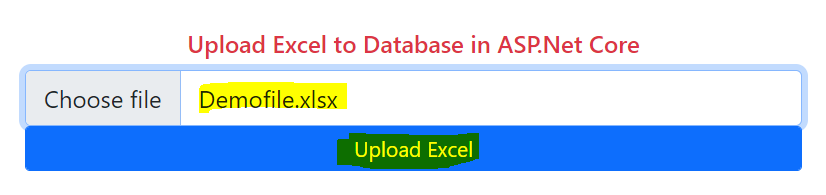
Click on the Upload excel button as shown in above image it will upload a excel sheet in uploads folder inside the wwwroot folder as shown in below image and then upload the data into the database as shown in attached database image.
After clicking on upload button you can see uploaded file in a folder in wwwroot inside uploads folder as shown in above image and apart from it data is saved in database in tblStudents table as you can see in below image.
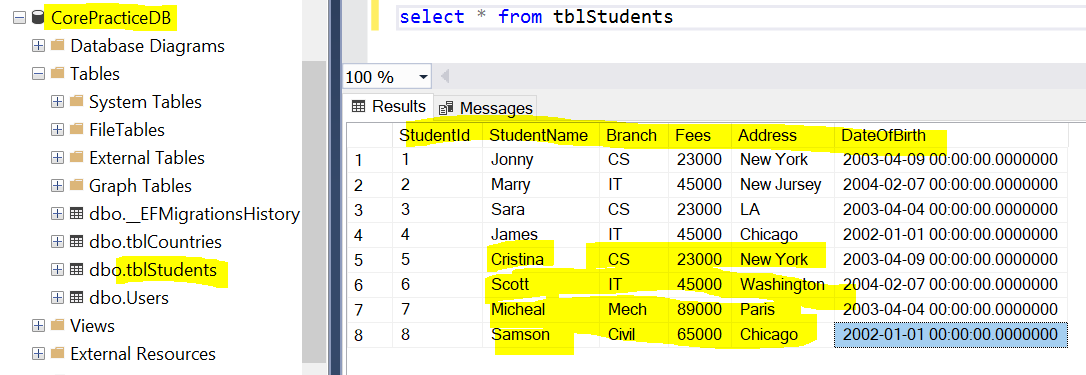
Below is the excel sheet that we have uploaded into the database, you can check it with database entries that is exact same as like as in below excel sheet. Below excel sheet is the data that we have uploaded into the database.